

Billing and Payments Made Easy with Sky Schedule
April 8, 2026
Billing and Payments Made Easy with Sky Schedule
Introduction to Billing
Powered by Stripe
We've partnered with Stripe - the gold standard in payment processing - to bring flight schools a seamless, professional billing experience built specifically for how you operate. From invoicing students to managing instructor payments, everything lives in one place.
Getting Started: Setting Up Your Account
If you haven't set up billing yet, the first step is to click the Get Started with Payments button. A pop-up will appear giving you a heads-up to have your business details handy before you begin. This includes things like:
- EIN (Employer Identification Number)
- Business address
- Any other relevant business information
Once you're ready, you'll be walked through an embedded onboarding flow where your Stripe account gets created and connected. You'll be prompted to enter your business details step by step - just follow the prompts and fill in the required fields as you go.
.png)
Checking Your Account Status
After completing onboarding, head to Settings and scroll to the bottom. Here you'll find your account status, which may show as:
- Pending - still being reviewed
- Action Required - something needs your attention (for example, a missing EIN confirmation or other business detail)
- Active - you're good to go
Make sure your statement descriptor is also set up here. This is the name that appears on your customers' bank statements and is required for processing payments. It's typically configured during onboarding, but double-check that it's filled in.
.png)
Billing Settings & Controls
Processing Fees
You can choose to pass Stripe's 2.9% processing fee on to your students or instructors. When enabled, this fee is automatically added to any invoice you generate - no manual math required.
Flight Billing Controls
Choose how flights are billed. You can base billing on:
- Hobbs time
- Tach time
- Reservation time
You can also enable a Hobbs multiplier or Tach multiplier if your pricing structure requires it.
Instructor Hourly Rate
You can include an instructor's hourly rate directly on invoices. To set this up, navigate to Instructors, click View Account Settings, then Edit Profile, and enter their hourly rate there.
Instructor Invoice Permissions
Toggle on which instructors you'd like to give invoice-sending permissions to. Once enabled, those instructors will have the same invoicing access as you do.
The Transactions Tab
The Transactions tab is your central hub for all billing activity.
Completed Transactions
This is where all successful payments live. You can click on any row to view the full invoice details, download a PDF copy, or void the payment if needed.
Unpaid Invoices
All invoices that haven't been paid yet will appear here. They'll stay in this tab until the student or instructor completes their payment.
Reservations
The Reservations tab displays all properly completed flights. If you're billing based on reservation details, it's important that your instructors complete flights correctly in the system.
Clicking the dropdown on any reservation shows you:
- Reservation start and end times
- Hobbs delta
- Training details
- ADS-B data overlay
From here, you can click Send Invoice and the system will automatically pull in the aircraft's hourly rate along with the Hobbs or Tach time (based on your settings), calculate the total, and include the instructor's hourly rate if one is configured. It builds the invoice for you.
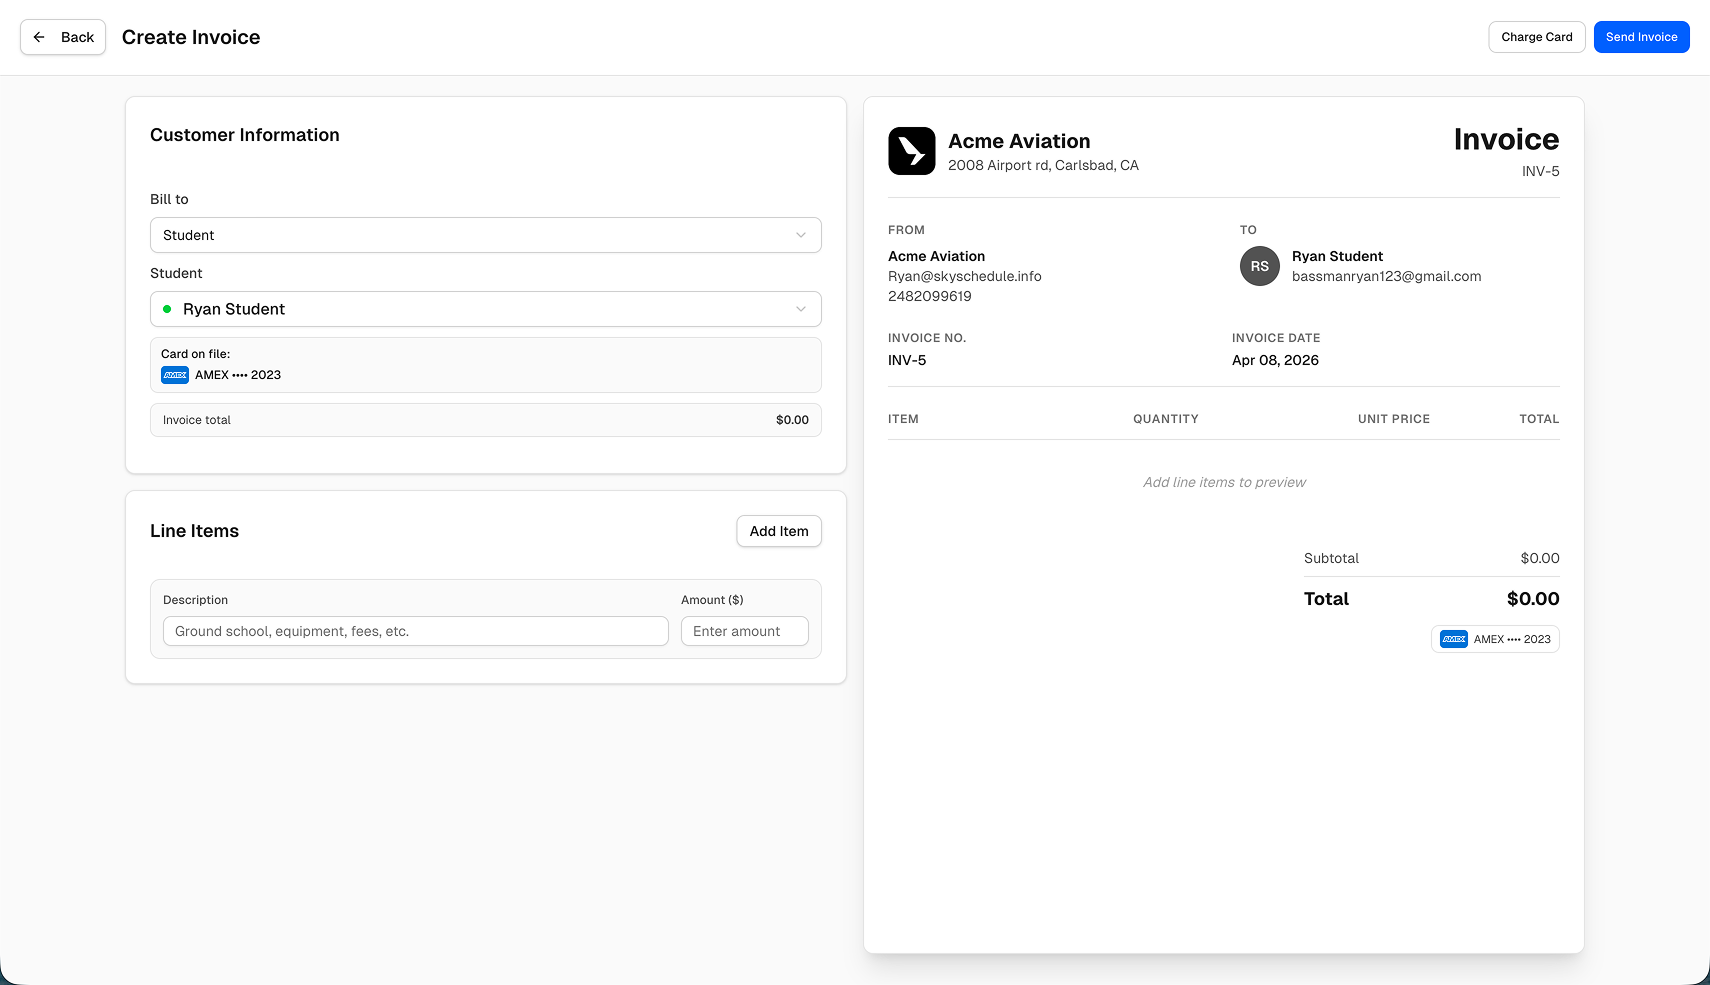
Creating a Standard Invoice
To manually create an invoice, click Create Invoice and select whether you're billing a student or instructor. From there:
- Select the recipient
- Add your line items and amounts
- Click Send Invoice
The recipient will receive an email with a "Pay Now" button. They can also log into their own dashboard at any time to view all of their paid and unpaid invoices.
Accounts & Cards on File
One of the most powerful features in billing is Accounts - a streamlined way to manage saved payment methods.
- Students and instructors can go to Billing Information in their Invoices tab and add a card on file themselves. A card is also automatically saved after any successful transaction.
- Once a card is on file, you can charge the card directly from the Accounts tab.
- You can also charge the card directly when creating a new invoice. If a card is on file, it will be displayed and you'll have the option to either send an invoice or charge the card immediately.
This eliminates the need to manage balances manually or chase down payments - just charge and move on.
Schedule a Demo
Want to see Sky Schedule in action or have a question about features, pricing, or setup? Just fill out the form and we'll follow up.